Nothing quite says holiday cheer like a sweet treat that's layered with creamy textures and a peppermint punch. This Candy Cane No-Bake Dessert Recipe is one of my go-to festive favorites – it's easy, no oven needed, and always gets raves from family and friends.

Jump to:
Why You'll Love This Recipe
This Candy Cane No-Bake Dessert Recipe is a lifesaver when the holidays sneak up and you want something impressive without the fuss. I love how each bite marries that cool peppermint crunch with luscious white chocolate and creamy layers. It’s perfect for potlucks, last-minute guests, or when you just want to indulge.
- Simple no-bake process: You don’t need an oven, so it’s mess-free and perfect for busy days.
- Festive flavors: The crushed candy canes add that juicy burst of peppermint that feels like a holiday hug in every bite.
- Layered delight: Cream cheese, pudding, and whipped topping create a dreamy texture combo that everyone loves.
- Easy to customize: You can tweak it with different cookies or toppings to make it truly your own.
Ingredients & Why They Work
The magic of this Candy Cane No-Bake Dessert Recipe lies in how the ingredients harmonize. The Oreo crust provides a chocolaty base with a slight crunch, while the cream cheese smooths things out, and the pudding adds silky richness. Candy canes bring the iconic peppermint twist. Here’s a quick rundown on why each ingredient is essential.
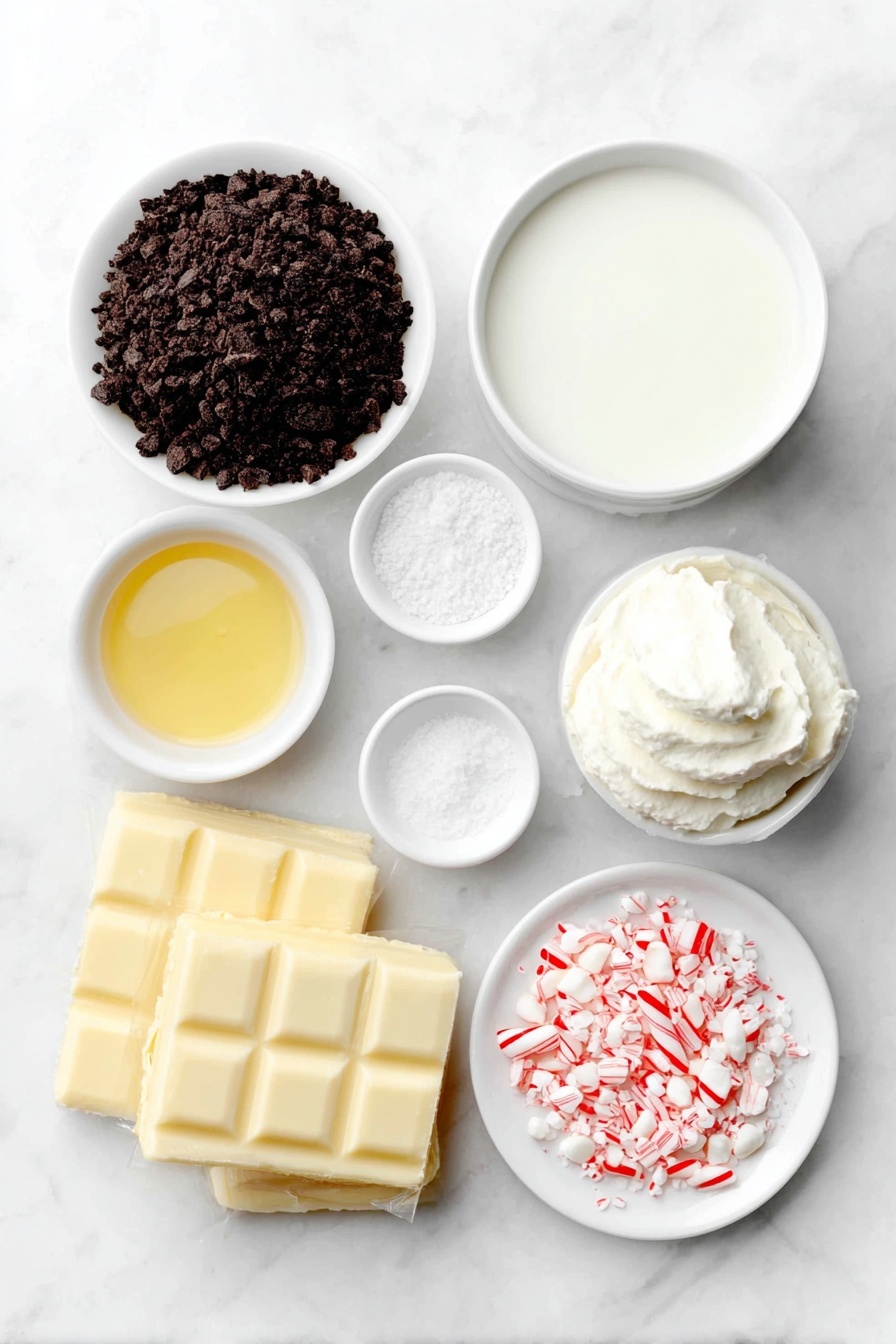
- Oreo cookies: The flavorful chocolate cookie crumbs make a sturdy, tasty crust that contrasts nicely with the creamy filling.
- Unsalted butter: Helps bind the cookie crumbs together while adding richness without overpowering saltiness.
- Salt: Just a pinch to enhance flavors and balance sweetness.
- Cream cheese: Gives the dessert a tangy smoothness that cuts through the sweetness.
- Powdered sugar: Dissolves easily for a silky sweetness in the cream cheese layer.
- Milk: Moistens and lightens both the cream cheese mixture and pudding, keeping everything luscious.
- Whipped topping: Adds fluffy, airy softness that lifts the dessert’s texture.
- Crushed candy canes: Loads of peppermint flavor and a little crunchy, colorful festivity.
- White chocolate pudding mix: Creates a creamy, dreamy middle layer that pairs perfectly with peppermint.
Make It Your Way
One of the best things about this Candy Cane No-Bake Dessert Recipe is how easy it is to make it your own. Over the years, I’ve tried switching up cookies and adding mix-ins to suit different tastes or dietary needs – and honestly, it’s hard to go wrong!
- Variation: I once swapped the Oreo crust for ginger snaps to amp up the holiday spice vibe – it was a lovely twist my guests loved.
- Dietary mod: For a lighter version, try using low-fat cream cheese and a sugar-free pudding mix. The texture changes a bit but still satisfies your sweet tooth.
- Seasonal switch-up: Swap candy canes for peppermint bark or crushed toffee for a different textured surprise.
Step-by-Step: How I Make Candy Cane No-Bake Dessert Recipe
Step 1: Crush the Oreos into a perfect crust
Start by pulsing your Oreos in a food processor until they’re finely ground—that’s key for getting the crust to hold together nicely. Then, add melted butter and a pinch of salt and pulse just enough to mix. Don’t overdo it or it’ll get too wet. Press the mixture evenly into your 9x13-inch dish and pop it in the fridge to chill while you whip up the filling. This step sets the stage, so use your hands or a flat-bottom cup to get it packed firmly.
Step 2: Whip up the creamy peppermint layer
Beat softened cream cheese with powdered sugar and milk until silky smooth – it usually takes about two minutes. Then fold in one cup of thawed whipped topping and half the crushed candy canes. This layer is where that festive peppermint flavor starts to shine, so be gentle folding in the candy canes so they don’t get crushed too finely.
Step 3: Make the dreamy white chocolate pudding layer
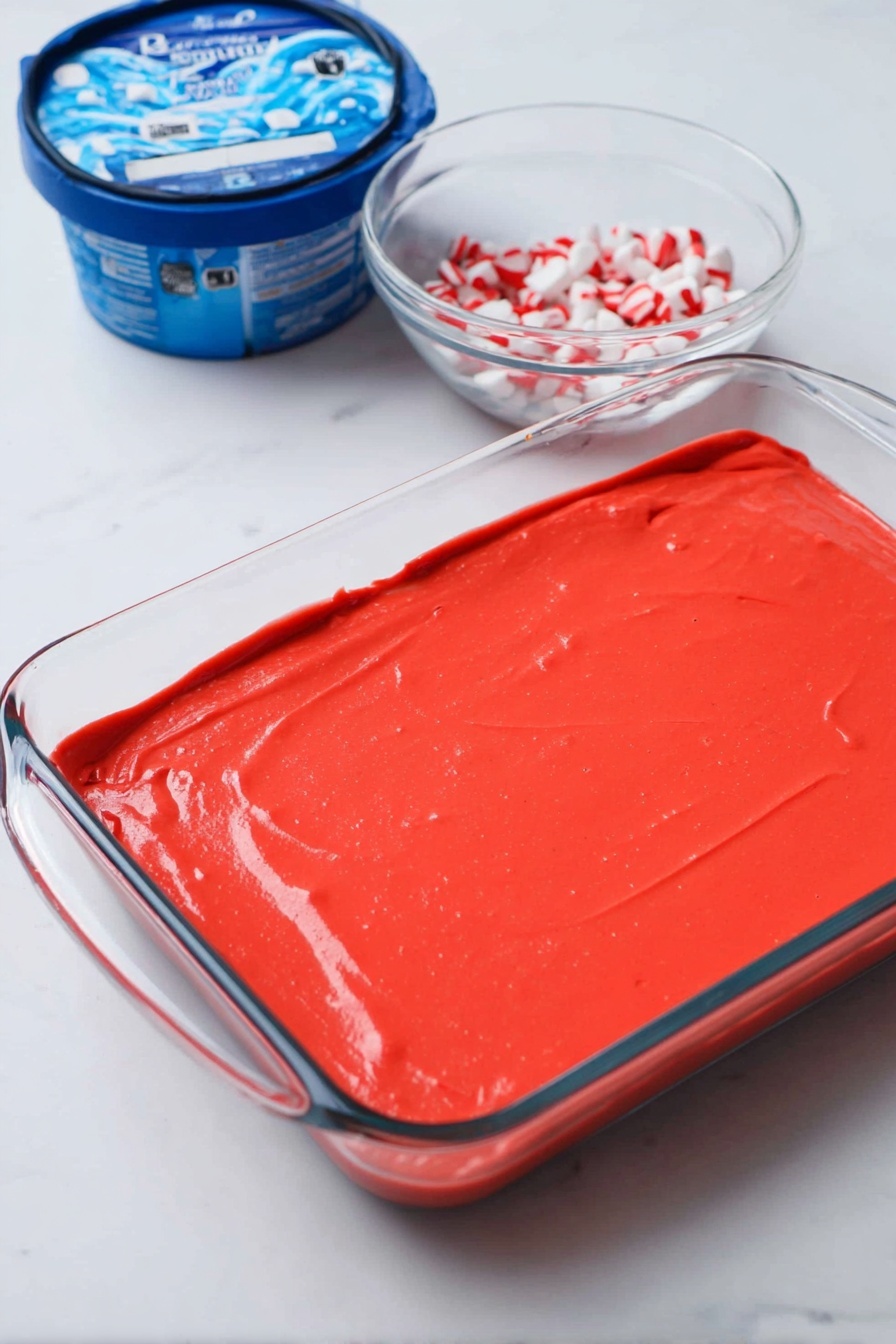
Whisk the white chocolate pudding mix with cold milk for two minutes until it thickens. This layer adds that luscious, smooth contrast to the cream cheese and crunchy crust. Spread it gently over the chilled peppermint cream cheese layer so you don’t disturb the layers below.
Step 4: Finish with fluff and chill
Spread the remaining whipped topping evenly over the pudding layer. Cover tightly with plastic wrap or foil, then refrigerate for at least four hours to let everything set perfectly. This waiting is the hardest part – trust me, it’s worth it!
Step 5: Garnish and enjoy
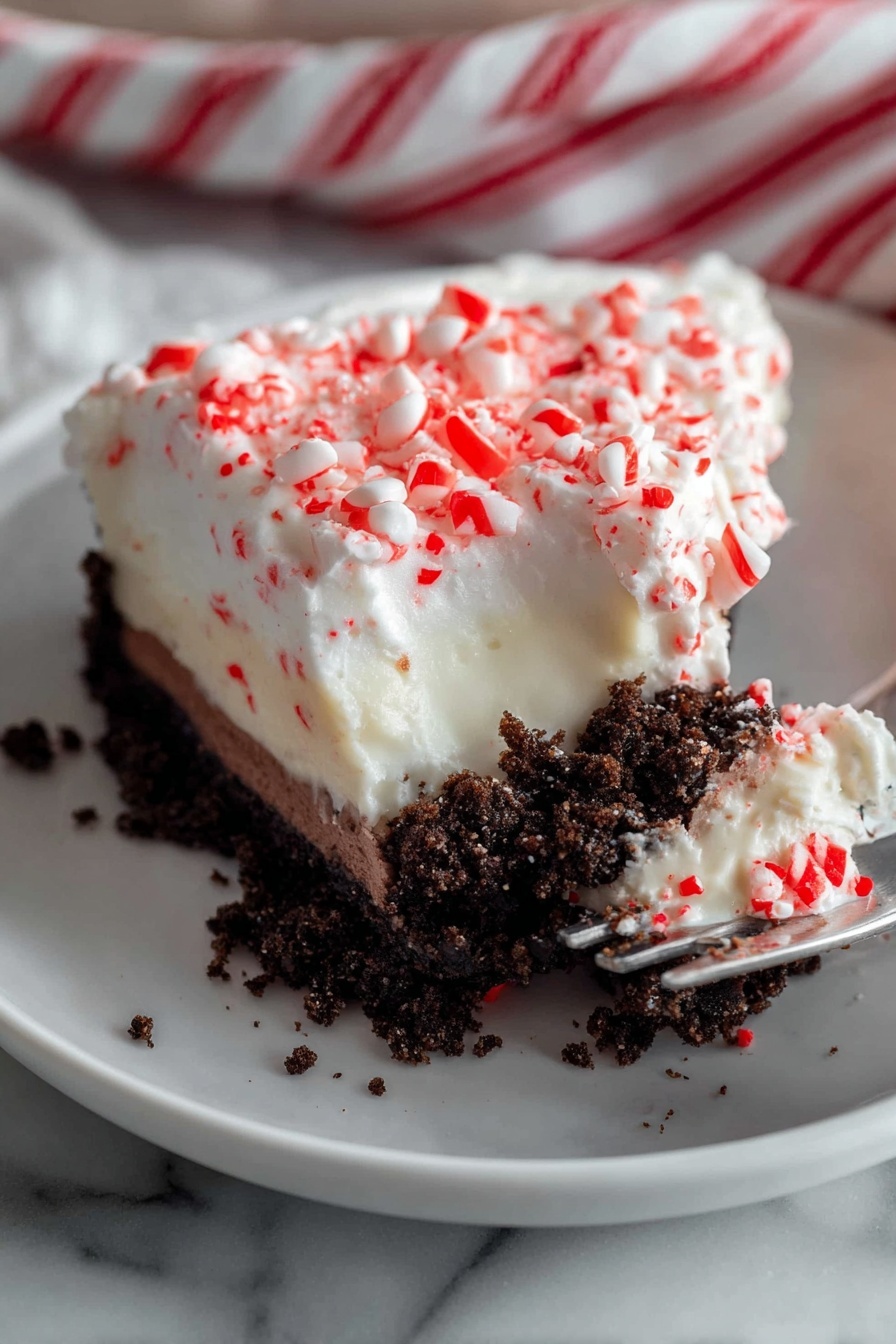
Just before serving, sprinkle the dessert generously with the remaining crushed candy canes for that extra festive crunch and pop of color. Slice into squares and watch it disappear fast!
Top Tip
After making this dessert several times, I’ve picked up a few little tricks that really help it come together beautifully and taste amazing every time.
- Pressing the crust firmly: Use a flat-bottomed glass or measuring cup to pack the Oreo crust tightly – this keeps your base from crumbling when you serve.
- Softening cream cheese properly: Let it sit at room temperature for at least 30 minutes so it blends smoothly with no lumps.
- Folding candy canes gently: Fold with a spatula instead of stirring vigorously to keep candy cane pieces intact, giving you that delightful crunch.
- Chilling time patience: Don’t skip the chilling step – it helps the layers set and flavors meld, making slicing neat and clean.
How to Serve Candy Cane No-Bake Dessert Recipe
Garnishes
When I serve this dessert, I stick to crushed candy canes on top because they add color and texture. Sometimes, I add a few mini peppermint candies or fresh mint leaves for a pop of green—it makes the platter look extra festive without changing the flavor profile.
Side Dishes
This dessert shines on its own, but it pairs beautifully with classic holiday drinks like hot cocoa or spiced eggnog. If you want something savory alongside, some lightly salted nuts or cheese platters balance the sweetness nicely.
Creative Ways to Present
Need to impress at a party? Try layering this dessert in clear individual glasses or jars. You can alternate the layers with crushed candy cane and whipped topping in mini trifles—that way guests get their own perfect portion with a pretty view. Tying little ribbons around the jar makes them gift-ready too!
Make Ahead and Storage
Storing Leftovers
Store leftover dessert in an airtight container or covered tightly with foil/plastic wrap in the fridge. It keeps surprisingly well for 3-4 days and the flavors actually meld together even more over time, making it taste even better the next day.
Freezing
While I haven’t tried freezing the whole dessert, I do freeze portions when I’m short on time. Wrap individual slices tightly in plastic wrap and place in a freezer bag. Thaw overnight in the fridge and add fresh toppings after thawing to keep the texture fresh.
Reheating
This dessert is best served chilled, so reheating isn’t really needed. If it’s too firm from the fridge, just let it sit at room temperature for 10-15 minutes before slicing and serving—that softens it just enough.
Frequently Asked Questions:
Definitely! While Oreos give a great chocolatey flavor, ginger snaps or chocolate wafer cookies work well for a more spiced or mild base. Just crush finely and press firmly for the crust.
White chocolate pudding adds a rich, creamy layer that balances peppermint perfectly. However, you can substitute vanilla or even chocolate pudding if preferred — the texture will be similar, just a different flavor twist.
It’s best made at least 4 hours ahead so the layers set properly. You can prepare it a day in advance and keep it refrigerated, making it ideal for holiday planning and parties.
To make it dairy-free, try using dairy-free cream cheese alternatives, non-dairy whipped toppings, and a compatible pudding mix. Keep an eye on labels to ensure everything’s vegan or dairy-free. The texture might be slightly different but still delicious!
Final Thoughts
This Candy Cane No-Bake Dessert Recipe is like my little holiday secret: easy enough to whip up on a busy day, but fancy enough to impress guests. The layers of creamy, crunchy, pepperminty goodness never fail to put a smile on everyone’s face. I’m excited for you to try it and make it a festive staple in your kitchen, just like it has been in mine!
Print
Candy Cane No-Bake Dessert Recipe
- Prep Time: 15 minutes
- Cook Time: 0 minutes
- Total Time: 4 hours 15 minutes
- Yield: 12 servings
- Category: Dessert
- Method: No-Cook
- Cuisine: American
- Diet: Vegetarian
Description
Candy Cane Lush is a festive no-bake dessert perfect for holiday gatherings, featuring layers of Oreo cookie crust, creamy white chocolate pudding, whipped topping, and crushed candy canes for a peppermint twist.
Ingredients
Crust
- 36 Oreo cookies (14 oz package)
- ¼ cup unsalted butter, melted
- ¼ teaspoon salt
Cream Cheese Layer
- 1 (8 oz) package cream cheese, softened
- ½ cup powdered sugar
- 2 tablespoons milk
- 1 cup whipped topping, thawed (from 12 oz carton)
- ½ cup crushed candy canes
Pudding Layer
- 2 (3.3 oz each) packages white chocolate pudding mix
- 2 ¾ cups cold milk
Topping
- Remaining 11 oz whipped topping, thawed (from 12 oz carton)
- Remaining ¼ cup crushed candy canes
Instructions
- Prepare the crust: In a food processor, pulse Oreo cookies into fine crumbs. Add salt and melted butter and pulse just until combined. Press mixture firmly into the bottom of a 9x13-inch baking dish. Chill in the refrigerator while you prepare the filling.
- Make the cream cheese layer: In a medium bowl, beat softened cream cheese with an electric mixer until smooth. Add powdered sugar and milk, beating until smooth and creamy, about 2 minutes. Fold in 1 cup of whipped topping and ½ cup crushed candy canes. Spread this mixture evenly over the chilled crust.
- Prepare pudding layer: In a clean bowl, whisk together the white chocolate pudding mix and 2 ¾ cups cold milk for 2 minutes until thickened. Spread this pudding evenly over the cream cheese layer.
- Add whipped topping: Spread the remaining whipped topping evenly over the pudding layer. Cover dish tightly with plastic wrap or foil and refrigerate for at least 4 hours to set and chill thoroughly.
- Serve: When ready to serve, sprinkle the remaining crushed candy canes over the top for added festive crunch and peppermint flavor. Cut into squares and enjoy this no-bake holiday treat!
Notes
- This dessert is a no-bake delight, making it quick and easy to prepare for holiday parties.
- Use a sturdy food processor to finely crumble the Oreos for the best crust texture.
- For a stronger peppermint flavor, add a few drops of peppermint extract to the cream cheese layer.
- Ensure whipped topping is fully thawed for easier folding and spreading.
- The dessert tastes best after chilling for at least 4 hours but can be refrigerated overnight.
- Store leftovers covered in the refrigerator for up to 3 days.
Nutrition
- Serving Size: 1 slice
- Calories: 350 kcal
- Sugar: 30 g
- Sodium: 200 mg
- Fat: 18 g
- Saturated Fat: 10 g
- Unsaturated Fat: 7 g
- Trans Fat: 0 g
- Carbohydrates: 40 g
- Fiber: 1 g
- Protein: 3 g
- Cholesterol: 30 mg


Leave a Reply